Varjo Aero review: Almost queen of virtual reality
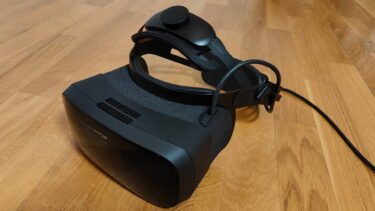
Varjo is launching its first consumer VR headset, Varjo Aero. Who should consider getting it?
Varjo is known for business VR headsets with an extremely high resolution. The company likes to talk about resolution on par with the human eye or resolution of the human retina, for example for Varjo VR-3. This is achieved by a double display design, where the small display in the focus area has a particularly high resolution.
Varjo headsets were not intended for home use until now, and also were hardly affordable for VR enthusiasts. Now, Varjo Aero is a VR headset that is supposed to mainly appeal to well-heeled VR sim fans.
I was provided with an Aero headset by Varjo for a review. Is the image as good as advertised? Is the VR headset worth a recommendation, or just overpriced toys?
Content
Varjo Aero review in a nutshell
Varjo Aero offers the clearest and sharpest VR image currently available with a huge sweet spot without any god rays or glare. Unfortunately, the display does have one flaw: When moving, the image curves slightly at the edges.
The headset is very comfortable, even for several hours, thanks to the clever additional adjustment above the forehead and the halo adjustment wheels.
Varjo Aero is suitable for wearers of glasses, but due to the limited folding angle of the halo mount, putting it on is not effortless. Sound is only available via additional headphones and the SteamVR tracking system, including VR controllers, has to be purchased additionally.
All together and without a powerful computer with at least an RTX 3070, the crisp VR picture costs well over 2,000 Euros.
Varjo Aero is suitable for you if …
- you want to enjoy the best VR image that is currently available in VR headsets for consumers,
- you are not bothered by slight image curvature at the edges in motion,
- headphones are standard equipment for you,
- you want high wearing comfort,
- you want perfect tracking,
- you primarily play VR simulations
- and you have a high-performance PC with enough money for the VR headset.
Varjo Aero is less suitable for you if …
- you mainly play VR games where fine details and the sharp display of text are not that important,
- you are bothered by slight image distortions at the edges,
- you expect a good and integrated sound system,
- you don't have a powerful PC and
- you don't have two to three thousand bucks lying around for high-tech toys.
Setup and configuration
This is what I've come to really hate about PC VR headsets: tangled cables, plugging around display ports and USB slots, and then configuration hiccups in at least two different software instances.
That's also the case with the Varjo Aero: A display port cable and a USB cable go from the PC to a small adapter box that needs to be powered. A USB-C cable (a bit thicker and considerably less flexible than the official Oculus Link cable) leads to the headset.
The single cable is deceiving: The display port and a USB port of the PC still have to be used, with a VR adapter with power connection in between. | Image: MIXED
The in-house software called Varjo Base is very accessible. The settings are quick to find, described in a mostly understandable way, and extensive enough to customize your VR experience. While screenshots or videos can be made from within the software, there are unfortunately no shortcuts for VR controllers – at least I did not find any.
Installing the software and drivers works well for the most part, though I had to skip setting up Steam devices because communication between Varjo Base and SteamVR, which recognized all devices correctly, didn't work. At least I was able to skip this. Periodically, the SteamVR window is not displayed or SteamVR does not launch in Virtual Reality, although it is active according to Steam. There are conflicts that can only be solved by restarting SteamVR and Varjo Base. The same applies to resolution conflicts that occur from time to time: Steam sometimes overwrites Varjo and vice versa.
Installing PC VR is still as overly complex and annoying as it was in 2016 when I started using HTC Vive. Fortunately, I already had the SteamVR base stations on the wall, otherwise that effort would have been added as well.
Varjo Aero: Resolution, colors, frame rate, performance
Aero doesn't come with the Varjo-typical dual-display solution, but with two mini LED displays and a resolution of 2,880 x 2,720 pixels per eye. On paper, that does not sound significantly much more than the 2,448 x 2,448 resolution of HTC Vive Pro 2 (review). However, the difference is like night and day.
The reason for this is not only the pixel density per degree (PPD) of 27 by default and 35 maximum (Vive Pro 2: 20 PPD; Valve Index: 11 PPD), but also the aspherical lenses: In combination, a great image clarity is achieved. Even the smallest text is super sharp – and without any god rays (light rays that refract on the lens) and without glare (rings of rays around bright objects). Against the glare storm of Vive Pro 2, this is like the difference between a snowstorm and a sunny summer day.
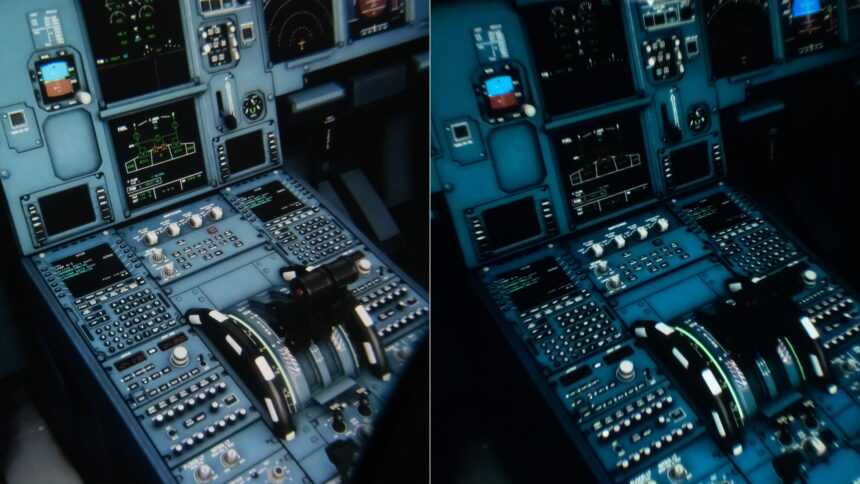
Comparison of the image between Varjo Aero (left) and HP Reverb G2 (review) based on a cockpit in Flight Simulator. | Image: Varjo
In addition, there is the impressively large sweet spot: I can look around with my eyes without experiencing extreme blur. Only in the very corners and at the edges do I notice the usual blurriness, but it is much less dominant than in all other current VR headsets on the market. 90 Hz refresh rates ensure a clean, smooth impression at all times.
So, does Varjo offer display perfection? Unfortunately, no. In motion, for example when turning the head, the edge areas of the image seem to bulge slightly. This has already been mitigated with software patches, but it is still visible and can be annoying depending on the sensitivity. Varjo promises to work on it, but it is unclear if they can get rid of it completely. In longer tests in VR games like Half-Life: Alyx, this distortion remains perceptible, but I can get used to it. In simulations like Project Cars 2 or Microsoft Flight Simulator, however, I hardly noticed it.
So-called chromatic aberration can also be noticed here and there, i.e., color fringes on objects – but that honestly didn't bother me. The black levels cannot compete with an OLED panel and are more in the dark gray range. A passthrough function is completely missing.
The performance with an RTX 3080 is excellent on the default setting of 27 PPD. My computer does not manage a full 35 PPD – it stutters everywhere.
Field of view, sweet spot, eye distance and eye tracking
The field of view is a good standard, offering 115 degrees horizontally. The lens shape is flattened at the top and bottom, but the impression of a letterbox slot is not as dominant as with Vive Pro 2.
The eye distance can be adjusted between 57 and 72 millimeters. I can either enter the exact distance in the Varjo Base software, or I can let the integrated eye tracking measure the distance automatically. A calibration at the beginning lets me follow several small dots on the display with my eyes, which works perfectly. My glasses are apparently no obstacle when tracking my eyes.
The integrated eye tracking currently has no application areas. A demo shows what is possible. In it, I look from an air traffic controller tower to a large airport and can move a circular marker from object to object with my eyes. This way I can identify gates and planes including status and identifier. With proper calibration, this works well and also quite precisely. However, applications, such as in games, have yet to be developed.
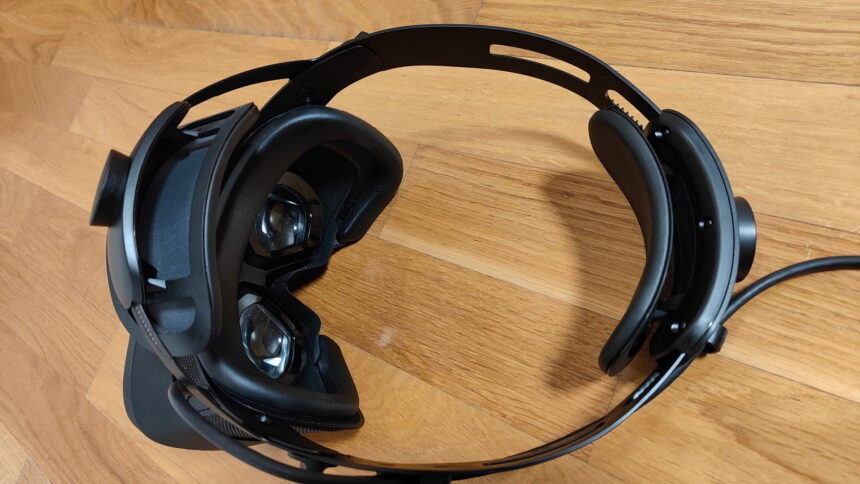
Varjo Aero: Wearing comfort
Varjo Aero weighs a total of 743 grams without the cable. Unfortunately, the halo ring cannot be folded up far enough. Putting the VR headset on can be difficult for persons wearing glasses and having a slightly larger head circumference – I have to "enter" the VR headset diagonally from below. There is enough room inside the VR headset for my slightly larger glasses frame, but the distance to the lenses cannot be adjusted. Larger or thicker glasses with a different head shape or nose condition could well come into contact with the lenses.
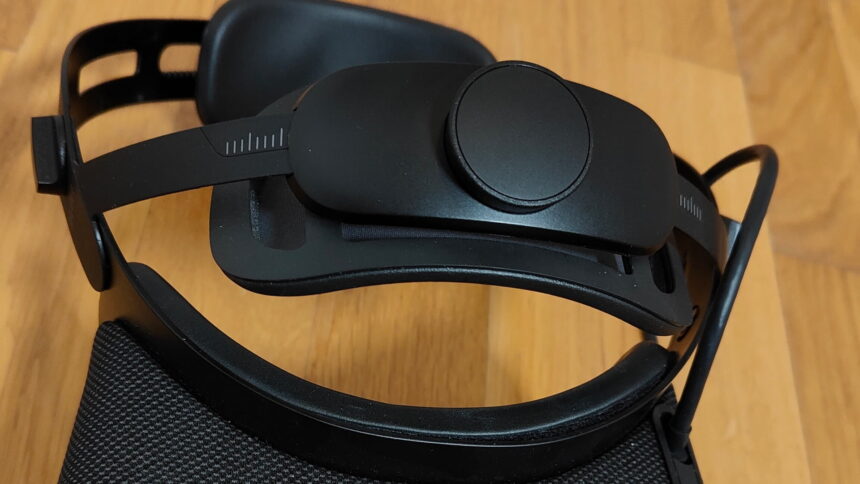
This upper and adjustable head mount ensures that Varjo Aero is currently the most comfortable VR headset. | Image: MIXED
That being said, this head mount is the smartest and most comfortable yet since Deluxe Audio Strap and the PlayStation VR's head mount. The halo is attached to the bottom back of the head with a typical dial. However, the highlight is the additional mount just above the forehead. It can also be adjusted via a dial and thus lifts the heavy front of the headset, and shifts the weight properly to the top of the head. This eliminates the need for too much pressure on the face, which in turn enables longer VR sessions.
Additionally, I can change the angle of the VR headset on two rotary buttons on the right and left of the halo. With the large sweet spot, this almost automatically ensures an almost perfect and very comfortable fit of the VR headset.
In my test, Varjo Aero only had minimal light gaps in the nose area, but everything else was cleanly covered.
Tracking, VR controller and sound
For tracking, Varjo relies on SteamVR, which is the undisputed top solution on the current market. Varjo recommends SteamVR 2.0 base stations, but the 1.0 stations worked just as well in my review. Valve Index (review) controllers are a good choice for operation, if you have or can get some. I tested with the retro sticks of the original Vive myself – here, too, everything works flawlessly, precisely and without problems.
Varjo makes an unnecessary mistake with the sound. Instead of using an over-ear solution like Valve Index, there is only a jack connection. Thus, you need additional headphones, which increases the setup times considerably and completely cuts the user off from the environment. Even though the latter is certainly useful sometimes depending on the game or experience, an integrated sound solution should be standard by now in my opinion.
Varjo Aero review summary: Almost perfect is just not perfect
The Varjo Aero's image is a real eye-opener even for a VR veteran like me, who tried quite a few VR headsets. This is what I imagine high-end virtual reality to look like. The pixel density combined with the aspherical lenses (die, Fresnel lenses, die!) make for a near-perfect image, with no god rays and no glare! Varjo's new VR headset wipes the floor with the competition.
Unfortunately, though, the Finns also suffer from a lack of perfectionism often found in the tech industry: if I've already built such a good VR image – why am I not investing some more time, money, and love to erase the bulge effects at the edges of the image? It annoys me when I see such carelessness – for whatever reason it exists.
This is why those little, annoying "buts" stick around:
Varjo Aero offers the best image of any current VR headset, but the distortion at the edges is annoying. Varjo Aero offers the best comfort of any VR headset to date, but it doesn't have an integrated sound system. Varjo Aero uses SteamVR's outstanding tracking, but you'll have to buy the base stations and VR controllers separately. Varjo Aero is a great VR headset, but you'll need to own an expensive PC with barely available graphics cards in addition to the two to three thousand bucks for the VR system.
The first two "buts" in consideration of the last two prevent the unqualified recommendation. If I'm going to put such an expensive headset on the market, which in contrast to HTC's "premium" devices is really good, then I simply have to invest the last bit of perfectionism and make it perfect.
Thus, Varjo Aero unfortunately missed the (currently unoccupied) virtual reality throne by a very narrow margin.
Varjo Aero: Datasheet
Note: Links to online stores in articles can be so-called affiliate links. If you buy through this link, MIXED receives a commission from the provider. For you the price does not change.