PSVR 2 beginner's guide: Tips and tricks for Sony's VR headset
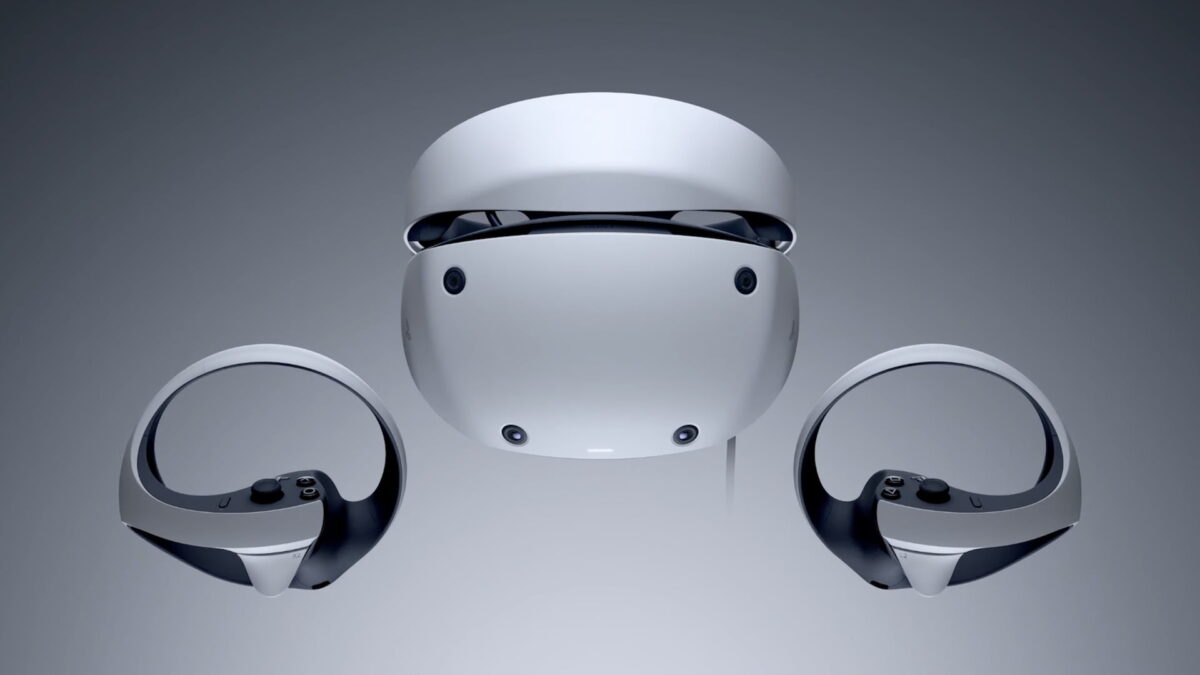
Our beginner's guide for the PSVR 2 provides useful tips and assistance to help you get the most out of your VR headset.
You've never worn VR headset before and want to get started with the Playstation VR 2? Then you're in the right place. This guide includes useful tips on everything from setting up the game environment to taking screenshots and video clips.
- Note: If you want to delve deeper into the subject, check out our Virtual Reality Guide. There you can learn everything about current and future technology, VR apps, VR headsets, and more.
Content
PSVR 2 Setup
When setting up the PSVR 2 for the first time, Sony guides you through a self-explanatory setup process. Following the individual steps exactly optimizes the PSVR 2 to your unique needs. However, you'll need to adjust some settings over time, so we'll show you below where you can make changes after the initial setup.
Settings menu and quick menu
The start screen of the Playstation VR 2 is the same as that of the Playstation 5, so those familiar with Sony's next-gen console should be able to find their way around the PSVR 2. The settings for the VR headset are a bit hidden, though. The PSVR 2 menu also only appears when the VR headset is connected to the PS5 console and turned on.
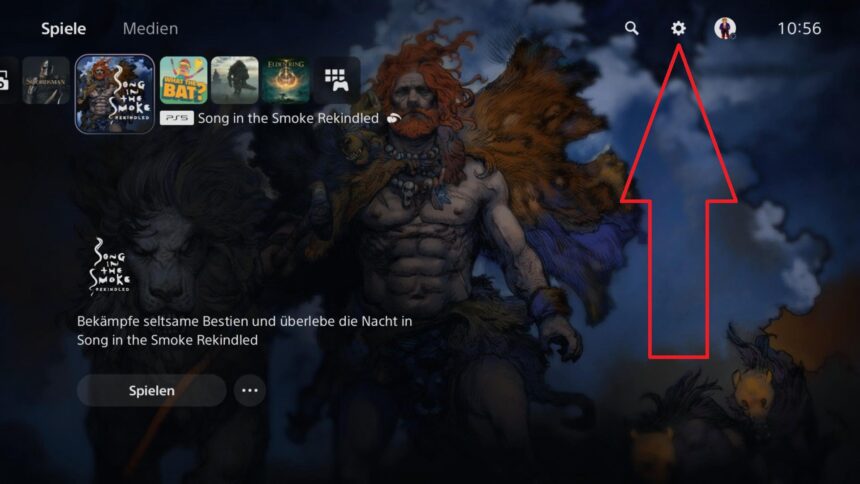
The small gear in the upper right leads you to the settings for the Playstation VR 2. | Image: Sony / MIXED
You can find the settings for the PSVR 2 as follows:
- Opens the "Settings" menu on the home screen (gear icon on the top right).
- Open the "Accessories" menu.
- Scroll down to "PlayStation VR 2".
In the settings, you can adjust the lens distance and the positioning of the VR headset, set the screen brightness, and toggle the headset's haptics on and off. The calibration of the tracking camera and the eye tracking are also in this menu.
Check the distance of the lenses and the calibration of the eye-tracking from time to time. If the settings do not match your individual needs, your gaming experience will be considerably dampened and can lead to motion sickness.
- Hint: If you press the Playstation button on the Sense controller while playing, a quick menu appears where you can make the most important quick settings.
Putting on the PSVR 2 correctly
As described in our PSVR 2 review, the VR headset has a comfort issue. For many gamers, the front head pad causes forehead pain after a while and leaves unsightly pressure marks. To prevent this, it is important to put the VR headset on correctly.
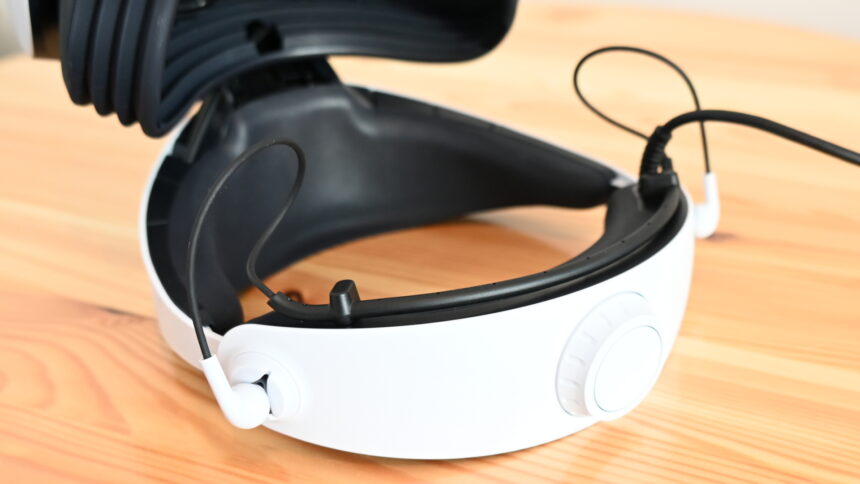
At the back of the PSVR 2's case, you'll find a push button with a locking wheel to adjust the Halo ring to your head size. | Image: MIXED
Hold the PSVR 2 by the front head pad of the halo ring with your left hand. Press the visor adjustment button and slide the visor all the way forward. Grasp the rear head pad with your right hand, press the button on the headband adjustment dial with your thumb, and pull the headband as far apart as possible without using force.
Now, slip your head into the "opened" VR headset and place the rear head pad at the back of the head, slightly above where your neck meets your head.
Then, hold the rear head pad and slowly push the front pad towards the forehead. The front head pad should rest against the skull above the forehead without pressing too hard into the forehead. When the VR headset fits comfortably, slide the visor in front of the eyes.
More tips for better comfort with the Playstation VR 2 can be found in the linked article.
Tips for the optimal gaming environment
Always make sure that you have enough free space around you. Basically, there are three ways to play VR games: sitting, standing, and moving freely around the room. No matter which option you prefer, the immediate gaming environment should be free of tripping hazards, furniture, and other objects.
This also applies to people and pets. Cats, dogs, and small children have a way of reacting strangely to your movements and, if in doubt, try to jump or poke at you. Since you can't see them, this can end painfully.
The rule of thumb for playing while sitting or standing is to extend both arms and rotate as much as possible. If you don't bump into anything, you have enough space. Bend slightly in all possible directions and really scan the entire immediate area. Children and pets should either be removed from the playroom or supervised by other adults.
If you want to move freely around the room, you should keep an area of at least six square feet free. Of course, you can also use the PSVR 2 in smaller rooms, but make sure that you set up (and respect) the digital boundaries of the gaming room with care.
Passthrough, digital play space limits, and repositioning.
At startup, you define the safe play area and set a virtual boundary. You can also adjust the safe play area or create new ones at any time from the PSVR 2 menu.
The PSVR 2 can also display the real environment via the tracking cameras (passthrough mode). To enable Passthrough, press the function button at the bottom right of the display. When you leave the playing field, a virtual grid appears. If you continue through the grid, the game stops and the VR headset automatically switches to passthrough mode. This is a good indication that you should recenter yourself in the play area.
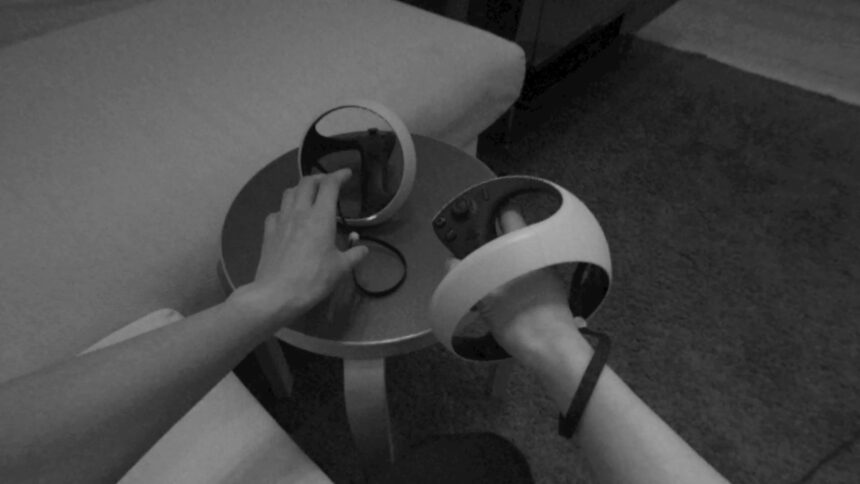
In Passthrough modeon the Playstation VR 2, you can see the real environment through the VR headset display. | Image: Sony
When the grid appears, take a step back and press the action button on the bottom right of the VR headset to engage Passthrough mode. Stand in the center of the room again, exit Passthrough mode, and hold down the Start button on the right Sense controller. The PSVR 2 now readjusts the gaming area to your position.
Tips for securing cables and consoles
Before each use, make sure the PSVR 2's USB cable is neatly unrolled. While the PSVR 2 cable is flexible, it can get twisted during high-motion gaming. Untangle it regularly so that it doesn't lose length due to loops, interfere with your gaming, or get damaged over time.
Disconnect the PSVR 2 from the console and grasp the VR headset with your left hand at the back of the headband. Hold the cable outlet tightly. Now, take the cable with the thumb and index finger of your right hand and slowly pull it through both fingers until you reach the USB plug. Apply slight pressure so that the cable comes loose.
Make sure that the PS5 stands securely. The cable of the PSVR 2 is long enough for the headset to remain tethered in the suggested play area with length to spare. If your PS5 is close to the edge of your play area, you can get tangled in that extra chord allowance or risk knocking over the console while in VR. If you're PS5 is further from the edge of the play area, you risk pulling the chord and disconnecting the headset or damaging your console.
It 's best to place the PS5 horizontally on the floor before using the headset. If the console is placed on an elevated surface like an entertainment center, make sure that it can't slide forward. If the PS5 is well "anchored," you can simply pull the USB cable out of the port in the worst case.
Taking screenshots and videos
You can record experiences at any time while playing with the PSVR 2. Screenshots can be exported in JPG or PNG format and video clips export in WebM or MP4 format. You can also choose between the resolutions 1920 x 1080 and 3840 x 2160 for video clips.
As with the PS5, you can take screenshots or videos during gameplay by pressing the Create button. On the Sense controllers of the PSVR 2, the Create button is located on the left-hand controller to the left of the joystick.
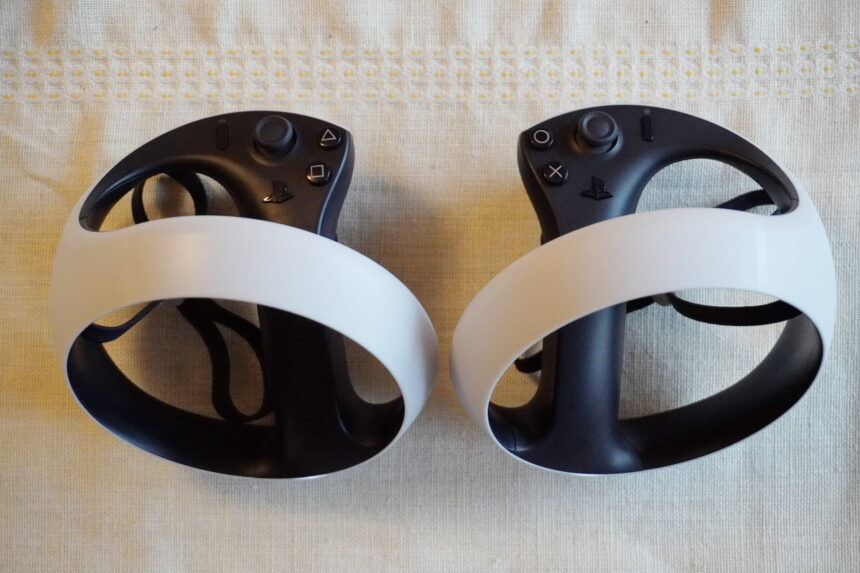
The Create button for screenshots and video clips can be found on the left Sense controller, to the left of the joystick. | Image: MIXED
Access the recording settings in the console's menu by opening the settings menu on the start screen and switching to the "Recordings and Transmissions" menu. Under "Recordings" you can set the shortcuts for the Create button and choose between three options.
We recommend the "Simple screenshots" option:
- Pressing once triggers a screenshot.
- Pressing twice saves a video clip of the last few minutes of gameplay (length is adjustable).
- Press and hold to open the Create controls.
If you open the create controls while playing, the game pauses and you can start a recording, among other things. This runs for a maximum of 60 minutes and then automatically saves the clip in the media gallery like all other screenshots and videos.
- Note: After 55 minutes, a timestamp appears at the top of the screen, which also appears in the recording. It is better to stop the recording manually after 55 minutes and start a new one.
Headphones and volume control
The Playstation VR 2 comes with a pair of in-ear earbuds that attach to the VR headset via a mini-jack plug. They deliver decent sound but don't fit into every ear equally well. Fortunately, you can use your favorite headphones.
The PSVR 2 supports headphones with a mini-jack connection as well as all Bluetooth headphones that are also compatible with the PS5. For example, if you use Sony's Pulse 3D wireless headset for the Playstation 5, you can control the volume directly via the controls on the headset.
If you use headphones without their own volume controls - this also applies to the included in-ears - you have to call up the Quick menu to change the volume. There is no haptic volume control on the VR headset.
Play movies & games on a virtual screen with "Cinema Mode"
You can also play "normal" 2D content in the Playstation VR 2. When you put on the VR headset and open a PS5 game, it looks like you're playing on a movie screen in the VR headset. Movies that you play via the media player or movies from the Playstation Store also play on the virtual screen.
Currently, the following third-party media apps are available for the PlayStation 5 and the PSVR 2:
- Spotify
- Apple Music
- Apple TV
- Crunchyroll
- DAZN
- Disney+
- Joyn
- NBA app
- Netflix
- Plex
- Pluto TV
- Amazon Prime Video
- Red Bull TV
- Sky Ticket
- Twitch
- TV
- UFC App
- WOW
- WWE Network
- YouTube
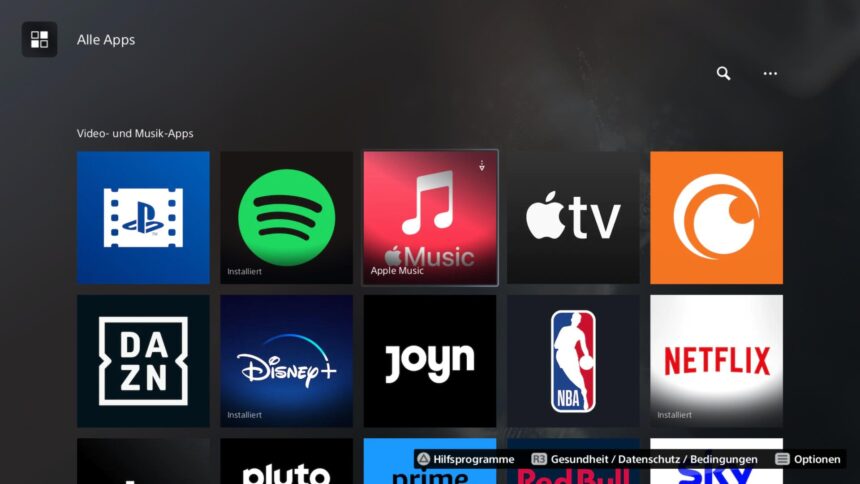
The selection of entertainment apps is still limited on the Playstation VR2. | Image: Sony / MIXED
In cinema mode, the background is always black. There is no virtual movie theater like in some apps for the Meta Quest 2. However, you can adjust the size of the screen. You can find the slider in the settings of the PSVR 2.
There, you can also adjust the video output and activate the direct output of HDR and 120 Hz videos from the PS5 directly to the PSVR 2. This is especially useful if the PS5 is connected to a TV that does not support HDR or 120 Hz.
How to clean the VR headset
VR games often require more movement than normal video games. This sometimes makes you sweat quite a bit under the VR headset. Therefore, clean the PSVR 2 after every game.
- Do not disassemble the PSVR 2 under any circumstances - this immediately voids the manufacturer's warranty.
Always unplug the VR headset before cleaning. To avoid damaging the material, do not use any cleaning agents that contain thinner, alcohol, or gasoline. Wet wipes are also unsuitable. Instead, wipe the case with a soft, dry cloth after each use. For the lenses, use only dry, soft eyeglass cleaning cloths - again, no wet wipes and certainly no paper towels or toilet paper.
Remove the light protection (black rubber around the lenses) and clean it with water. Pull carefully on the frame and loosen the nubs from their anchorage one-by-one. Sometimes a short tug helps but always proceed carefully so that nothing breaks.
Before putting the light shield back on, let it dry completely. The ear pads of the headphones can also be removed and cleaned with water. If dust has accumulated in the vents, vacuum it carefully with a handheld vacuum cleaner.
Note: Links to online stores in articles can be so-called affiliate links. If you buy through this link, MIXED receives a commission from the provider. For you the price does not change.